The Ruined Hall
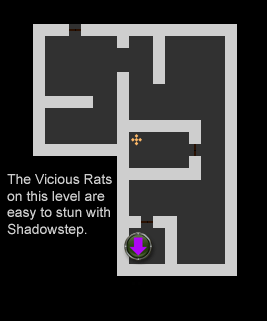
Level 1
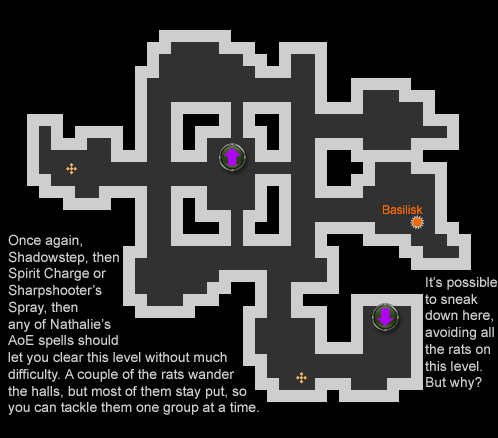
Level 2
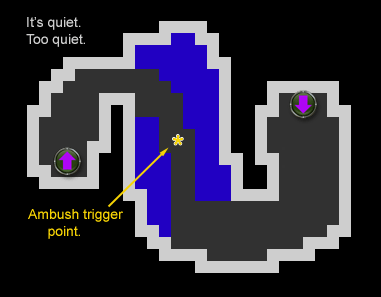
Level 3
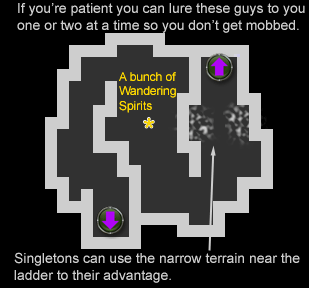
Level 4
Level 5
 The
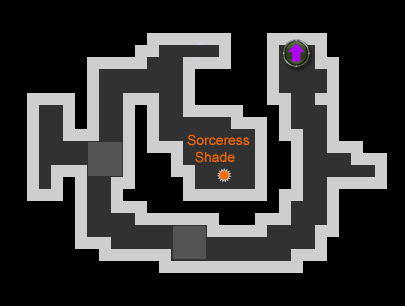
Sorceress Shade is tough! For best results, summon pets first
and then buff and haste before entering the room in combat mode. Battle Frenzy is your friend here.
The
Sorceress Shade is tough! For best results, summon pets first
and then buff and haste before entering the room in combat mode. Battle Frenzy is your friend here.
Do not engage in melee, except with pets, because striking her directly slows the attacker.
She
will almost immediately teleport a character away to one of the light
gray squares. She may do it again, depending on how long the fight
lasts. The best thing to do is to ignore the skeletons and try to make
your way back to her by any means possible. Shadowstep works well for
shadowwalkers; a sorceress could probably use Daze to good effect.
If all of your characters are somehow removed, do not exit combat
mode except as a last resort! She will auto-heal just as you do, and
you'll be back to square one.
She is immune to cold damage, but vulnerable to fire.